CCM Results
Overview
The Results tab provides a comprehensive view of the cookie scanning results for a selected website URL and scan version. It allows users to review detected cookies, vendors, scanned pages, and scan statistics, as well as manage cookie classifications and related metadata. Users can also directly compare scan result versions using the Compare Versions option available on the Results page to identify changes between different scan executions.
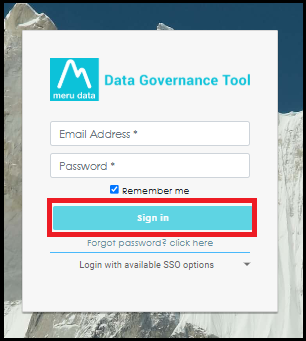
- Login to the Data Governance Tool by entering your credentials.
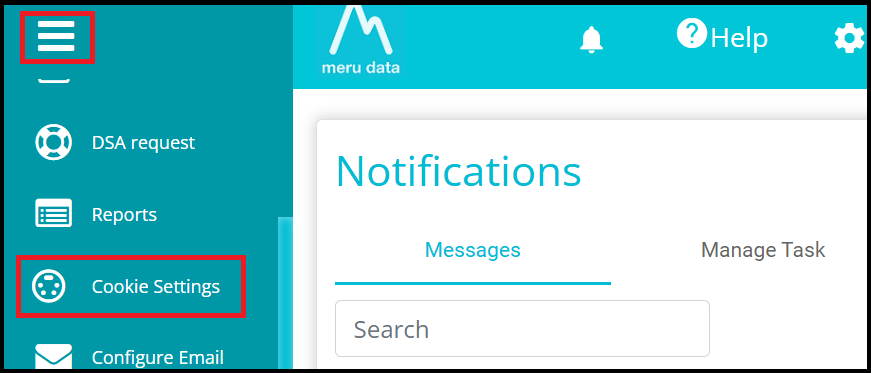
Click on the hamburger menu (three horizontal lines).
Navigate to Cookie Settings from the left-hand menu.
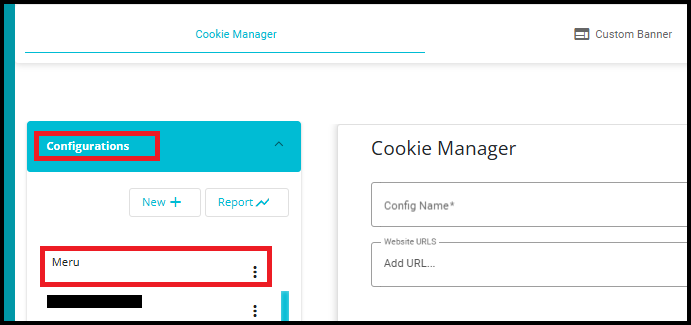
- In the Configurations section, click on any existing configuration.
- After selecting a configuration, click the Go To Scan button.

- Alternatively, click the three-dot (More Actions) menu next to the configuration name and select Scan and Autoblock.
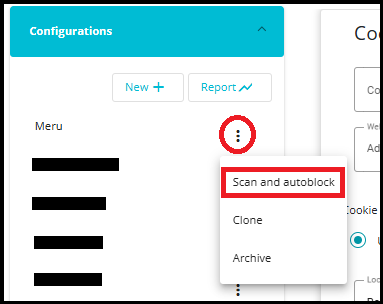
Whether you click Go To Scan or select Scan and Autoblock from the More Actions (three-dot) menu, the system navigates you directly to the Cookie Scanning and Auto Blocking page associated with the selected configuration.
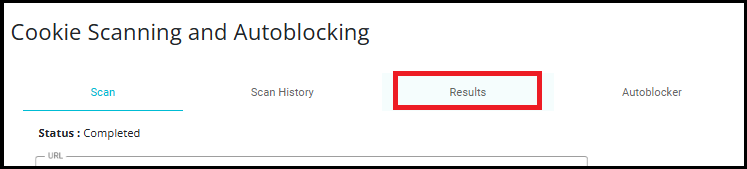
On the Cookie Scanning and Auto Blocking page, click the Results tab.
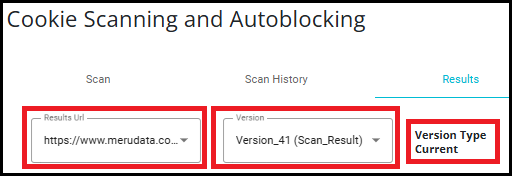
Results URL
- Displays the website URL for which cookie scanning results are available. If a configuration contains multiple URLs, you can use this dropdown to select the specific URL whose scan results you want to review.
Version Dropdown
Displays the available scan result versions for the selected URL. Each time a scan is executed, a new version is created and stored. Use this dropdown to switch between different scan results and review changes across scans.
New versions can also be created when users modify cookie information from the UI, upload scan result files, or reclassify cookies.
Version Type
Indicates the status of the selected scan version
Current: Represents the latest active scan result for the selected URL. This version is used as the primary reference for reviewing and managing cookies.
Legacy: Represents an older scan result that has been superseded by a newer version. Legacy versions are retained for historical reference, comparison, and audit purposes but are not considered the active scan result.
Upload File
- Allows users to upload multiple cookies at a time to the cookie scan result. Cookies and their details can be added to a spreadsheet which can then be uploaded to this page using the Upload File option. To reclassify multiple cookies, you can export the data, modify it on a spreadsheet and upload the modified data here using the Upload File button. For more details regarding upload file feature, refer to CCM upload file & Reclassify.docx
Compare Versions
Allows users to compare the currently selected scan result version with another available version for the same URL. This helps identify changes in detected cookies, cookie categories, and scan outcomes between different scan executions.
When you click Compare Versions, the system navigates to the Scan Insights page, where detailed comparison results are displayed.
By default, the system compares the version selected in the Results page with its immediate previous (legacy) version. For example, if Version_41 is selected, the comparison is performed against Version_40.
If required, you can change the versions being compared directly from the Scan Insights page by selecting different source and target versions.
Note: For detailed information about the Scan Insights page, refer to the CCM Scan History tab documentation.
Download Parse Result
- Allows users to download the parsed scan results for the selected URL and version. The downloaded file contains the processed cookie scan information, which can be used for offline review, reporting, auditing, or further analysis.

Scan Initiated On
- Displays the date and time when the cookie scan was started for the selected URL and version. This helps users identify when the scan execution began.
Scan Completed On
- Displays the date and time when the scan finished processing. By comparing the start and completion times, users can determine how long the scan took to complete.
Scan Status Indicates the status of the selected scan version. Common statuses may include:
Completed -- The scan finished successfully and the results are available for review.
In Progress -- The scan is currently running.
Failed -- The scan could not be completed due to an error.
Cancelled -- The scan was stopped before completion.
Initiated By
Displays the user who initiated the scan. This helps track scan ownership and provides an audit trail for scan activities.
If a scheduled scan or automated process starts the scan, the field displays System.
Cookies
- Displays the total number of cookies detected during the scan for the selected URL and version. This count includes all cookies identified across the scanned website pages.
Page URLs
- Displays the total number of pages that were scanned as part of the selected scan execution. This provides an indication of scan coverage across the website.

Vendors
Displays the total number of vendors identified from the detected cookies. Vendors represent the organizations or services associated with the cookies found during the scan.
Vendors can be identified from both cookie scan results and Privacy Findings.
When you click on the Vendors card, the system navigates to the Scan Result Vendors page. This page allows users to view, manage, and maintain vendor information associated with the scan results.
Scan Result Vendors Page
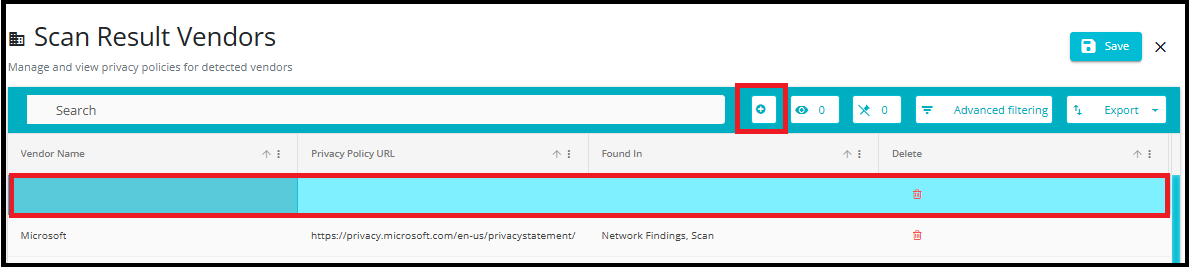
- The Scan Result Vendors page displays a list of all vendors identified during the selected scan, along with their privacy policy information and discovery source.
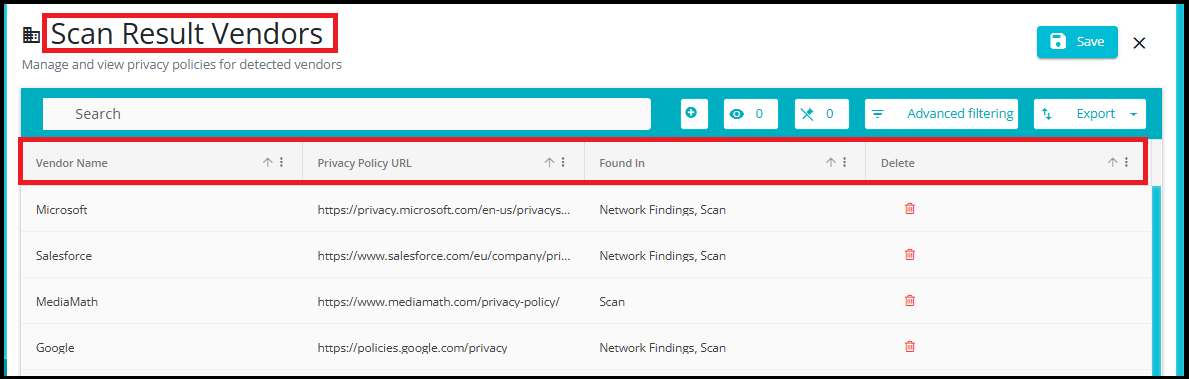
The Add (+) button allows users to manually add a new vendor to the Scan Result Vendors list.
How to Add a Vendor
Click the Add (+) icon.
Enter the vendor details.
Specify the Vendor Name (mandatory field).
Enter the Privacy Policy URL.
Click Save to create the vendor.
Note: The Vendor Name field is required. A new vendor cannot be created without providing a vendor name.
When saving a new vendor, the system validates the vendor's name against existing entries.
If the entered vendor name already exists, the vendor is not created.
A notification message is displayed at the bottom of the page indicating that a duplicate vendor was found.

If the vendor's name is unique and all required information is provided, then a new vendor will be added successfully.
When a new vendor is added successfully, the vendor count is updated automatically on the scan results dashboard.
For example, if the current vendor count is 30 and a new unique vendor is added, the Vendors count increases to 31.

Vendor Name
Displays the name of the vendor associated with the detected cookie.
Examples include Microsoft, Google, and other third-party service providers.
Users can directly edit the vendor's name in the UI by clicking on the Vendor Name field and updating the value as needed. Changes can be saved using the Save button.

Privacy Policy URL
Displays the vendor's privacy policy URL.
Users can review the privacy policy to understand how the vendor collects, processes, stores, and uses data.
Users can also edit the privacy policy URL in the UI by clicking the Privacy Policy URL field and updating the link as needed. Changes can be saved using the Save button.

Found In
Indicates how the vendor was identified during the scan.
Common values include:
Scan -- The vendor was identified directly from the cookie scan results.
Network Findings -- The vendor was identified through network requests or external resources detected during scanning.
Scan, Network Findings -- The vendor was identified from both cookie scan results and network analysis.
Delete
Allows users to remove the vendor record from the vendor list.
Clicking the delete icon removes the corresponding vendor entry.
Save
- Saves any modifications made to the vendor records.

Cookie Name
- Displays the name of the detected cookie. This helps identify the specific cookie that was found during the scan.
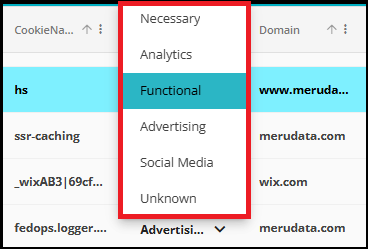
Category
Displays the classification assigned to the cookie based on its purpose.
Necessary -- Required for the website to function properly.
Functional -- Enables enhanced functionality and personalization.
Analytics/Performance -- Collects information about website usage and performance.
Advertising/Marketing -- Used for advertising, tracking, and marketing purposes.
Social Media -- Supports social media integrations and sharing features.
Unknown -- The cookie has not yet been classified.
Users can change the category assigned to a cookie by selecting a different value from the Category dropdown.
Note: Any manual modification performed on the scan result page, including adding a new cookie, editing an existing cookie, or deleting a cookie, requires reclassification before the changes are reflected in a new scan result version. For more details regarding reclassify refer to CCM upload file & Reclassify.docx
This allows users to review and correct cookie classifications identified during the scan.
Once updated, the selected category is applied to the cookie and used in cookie management, reporting, and consent-related activities.
Example:
A cookie is initially classified as Unknown after scanning.
After reviewing, the user determines that the cookie is used for website analytics.
The user selects Analytics from the Category dropdown.
Result: The cookie is reclassified as Analytics, and future reporting and consent management activities use the updated category.
Domain
- Displays the domain that sets or owns the cookie. This helps determine whether the cookie originates from the website itself (first party) or from an external provider (third party).
Vendor Name
- Displays the vendor or service provider associated with the cookie, if identified. This helps users understand which organization is responsible for the cookie.
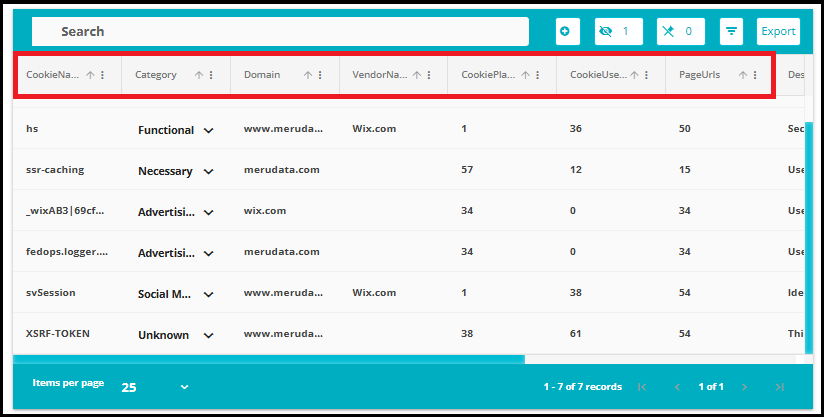
Cookie Placed Urls
Displays the number of URLs where the cookie was set or placed by the website or an external service.
This indicates the pages on which the cookie is initially created and stored in the user's browser.
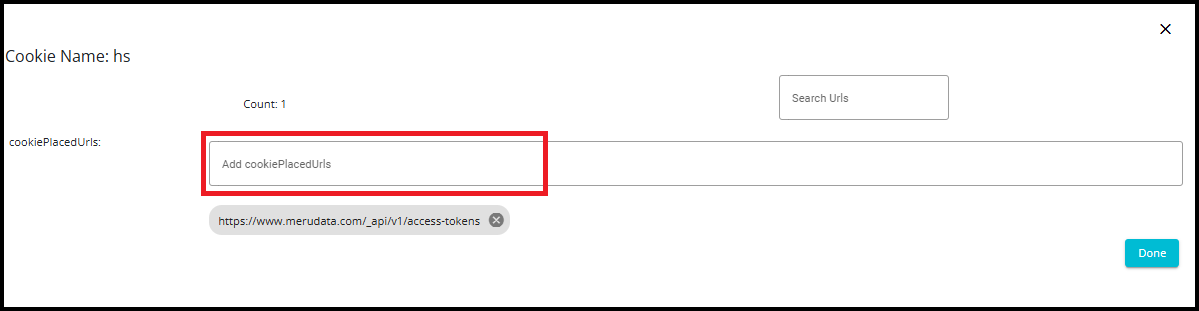
Clicking the value in the Cookie Placed URLs column opens a page displaying all URLs where the selected cookie was placed or set.
The page displays:
Cookie Name -- The selected cookie name.
Count -- Total number of placed URLs.
Search URLs -- Allows users to search for specific URLs.
Add Cookie Placed URLs -- Allows users to manually add new placement URLs.
A list of all URLs where the cookie was placed.
Cookie Used Urls
Displays the number of URLs where the cookie was accessed, referenced, or utilized after it was placed.
This indicates the pages where the website or application actively uses the cookie for functionality, authentication, analytics, personalization, or other purposes.
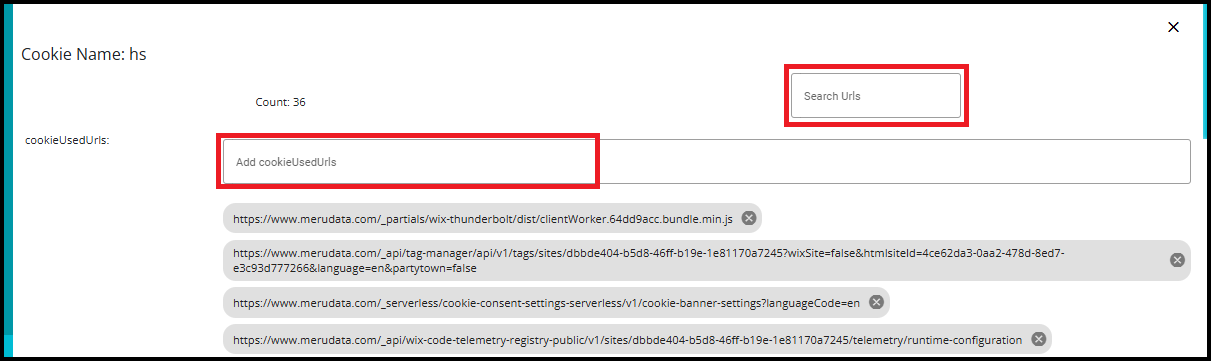
Clicking the value in the Cookie Used URLs column opens a page that displays all URLs where the selected cookie was observed being used during the scan.
The page displays:
Cookie Name -- The selected cookie name.
Count -- Total number of URLs associated with the cookie usage.
Search URLs -- Allows users to search and filter URLs displayed in the list.
Add Cookie Used URLs -- Allows users to manually add additional URLs to the cookie usage list.
A list of all URLs where the cookie was detected as being used.
Metric Meaning
Cookie Placed URLs --> Where the cookie was created or set.
Cookie Used URLs --> Where the cookie was later accessed or utilized.
Page URLs
Displays the number of pages on which the cookie was detected. This helps users understand the distribution and reach of the cookies across the scanned website.
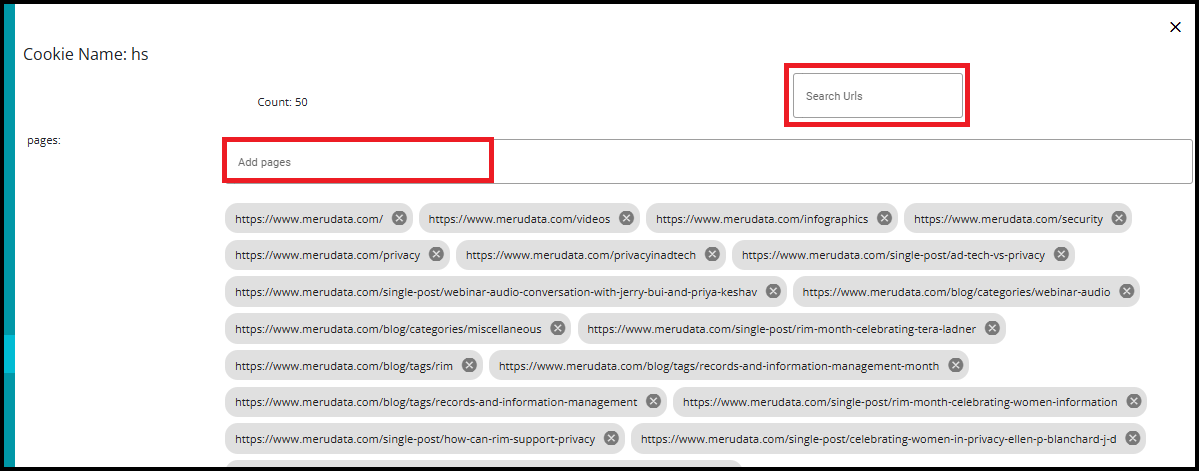
Clicking the value in the Page URLs column opens a popup displaying all website pages on which the selected cookie was detected.
The popup displays:
Cookie Name -- The selected cookie name.
Count -- Total number of pages containing the cookie.
Search URLs -- Allows users to search and filter page URLs.
Add Pages -- Allows users to manually add additional page URLs.
A list of all pages where the cookie was detected.
Remove URL
- Users can remove an existing URL by clicking on the X icon displayed next to the URL.
Done
- Saves the changes and closes the popup window.
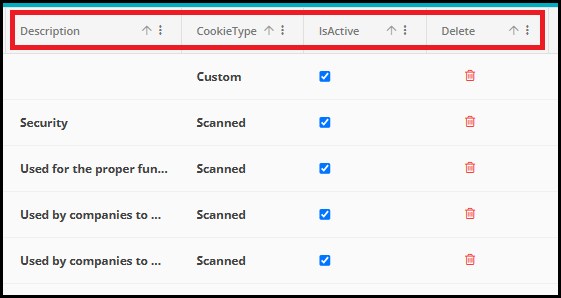
Description
Displays the description or purpose associated with the cookie.
A cookie can have multiple descriptions to provide additional context about its functionality and usage.
Cookie Type
Indicates how the cookie information was created.
Common values include:
Scanned -- Information automatically identified during the cookie scan.
Custom -- Information manually added by a user.
Is Active
Indicates whether the cookie entry is currently active.
Users can enable or disable a cookie entry using the checkbox.
- When Is Active is Enabled
The cookie entry is active and available for use by the system.
The cookie information is included in cookie management workflows, reports, and consent-related processing.
The cookie can be used as part of cookie categorization and compliance activities.
Example:
Cookie: XSRF-TOKEN
Category: Necessary
Is Active: Enabled
Result: The cookie remains active and is included in scan results, reporting, and consent management activities.
- When Is Active is Disabled
The cookie entry is marked as inactive.
The cookie information remains stored in the system for reference purposes but is not considered active for cookie management operations.
Users can re-enable the cookie entry later if required.
Example:
Cookie: Legacy Analytics Cookie
Is Active: Disabled
Result: The cookie record remains available in the system for historical reference, but it is not treated as an active cookie entry during cookie management activities.
Delete
Allows users to remove the selected cookie detail record.
Clicking the delete icon removes the corresponding entry from the cookie details list.